![]()
![]()
![]()
Use LEFT and RIGHT arrow keys to navigate between flashcards;
Use UP and DOWN arrow keys to flip the card;
H to show hint;
A reads text to speech;
89 Cards in this Set
- Front
- Back
Be sure to bring your: |
1. CDL 2. VTT 3. Med card
Or no refresher! |
|
|
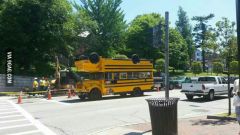
Begin Pre-Trip Inspection |
Turn the battery switch on. Turn the bus on master switch is in the night run position. Turn the hazards and fast-idle on |
|
Clip lights |
5 clip lights. amber in color (because they are located in front of the rear axle) clean not missing or broken and functioning properly (because they are all on and the bus is in night run). |
|
|
Front destination sign |
clean not missing or broken, and functioning properly. |
|
|
Mirrors |
securely mounted, clean, and not damaged. |
|
|
Windshield |
Bang on to make sure secure not damaged, has no cracks, and is clear. |
|
|
windshield wipers |
securely attached and not damaged. |
|
Front reflectors |
amber in color, clean, and not missing or broken. |
|
|
Hazards |
clean, not missing or broken, and functioning properly (because the hazards are on). |
|
|
Turn signals |
Right Turn Signal Check that the right turn signal is functioning properly (because the tester told you it was). Left Turn Signal Check that the left turn signal is functioning properly (because the tester told you it was). After checking the turn signals, turn the hazards back on. |
|
|
Headlights |
Low beams clean, not missing or broken, and functioning properly (As the bus is in night run). Tell the evaluator you will be checking the high beams. Proceed inside and click the high beams on. High beams clean, not missing or broken, and functioning properly (because they turned on). Tell the evaluator you will now be turning the high beams off. Proceed inside, click the high beams off. Check that the low beams have remained on after turning off the high beams. |
|
Side reflector |
located on the bottom of the bus, should be clean, not missing or broken, and should be amber in color. |
|

Running Light |
located above the front door. The light should be clean, not missing or broken, functioning properly (because the bus is in night run) and amber in color. |
|
|
Hazard light |
clean, not missing or broken, and functioning properly because the light is flashing. |
|
|
Windows |
As you make your way down and around the bus, knock on each window and make sure it is securely attached, not damaged, and clean. |
|
|
Front Entryway Lights (2) |
When doors open look up at them: talk about both of them light is clean, not missing or broken, and is functioning properly (because the bus is on and the front door is open). |
|

Kneeler/Wheelchair Ramp Light |
clean and not missing or broken. The light should only turn on when the bus is kneeling, or when the wheelchair ramp is deployed. |
|
|
Side destination sign |
The destination sign should be clean, not missing or broken, and functioning properly. |
|
|
Front door |
door is not damaged and is secure to the hinges. The windows on the door should not be damaged, and should be clean. The weather stripping seals should be intact. |
|
|
Front tires: Wheel Skirt |
Tug on the wheel skirt. Make sure it is securely attached to the bus and not damaged. |
|
|
Front tires: mudflap |
Kick the mud flap. Make sure it is securely attached to the bus and not damaged. |
|
|
Front tires: tread depth |
Tread depth on the front tire must be at least 4/32 of an inch. The tread should also be worn evenly. |
|
|
Front tires: sidewall |
sidewall of the tire should not be cut or damaged. |
|
|
Front tires: Air stem valve and cap |
Check for the air stem valve and cap. They should both not be missing, damaged, or broken. |
|
|
Front tires: Inflation |
The tires should appear to be properly inflated. |
|
|
Front tires: Rim |
The rim cannot be bent or damaged. The rim should be free from rust and have no welding repairs |
|
|
Front tires: Lugnuts |
Check all of the lug nuts to make sure they are present, not loose or cracked, and are free from rust. |
|
|
Front tires: Hub oil seal |
Run your hand under the hub oil seal. It should not be leaking any oil. |
|
Running light |
clean, not missing or broken, functioning properly (because the bus is in night run) and should be amber in color. |
|

Side reflector |
located at the bottom of the bus, should be clean, not missing or broken, and amber in color |
|
|
Rear Kneeler Light |
The light should be clean, and not missing or broken. The light should only come on when the bus is kneeling or the wheelchair ramp is deployed. |
|
|
Rear Door Lights |
Check both lights as you talk about them. The rear door lights should be clean, and not missing or broken. They should come on when the rear doors are open. |
|
|
Rear Door |
Make sure the door is not damaged and is secure to the hinges. The windows on the door should not be damaged, and should be clean. The weather stripping seals should be intact. |
|
|
Hazard light |
The light should be clean, not missing or broken, and functioning properly (because the hazards are on). |
|
|
Rear tires: Wheel skirt |
Tug on the wheel skirt. Make sure it is securely attached to the bus and not damaged. |
|
|
Rear tires: Mud flap |
Kick the mud flap. Make sure it is securely attached to the bus, and not damaged. |
|
|
Rear tire: Tread depth |
The tread depth on the rear tires must be at least 2/32 of an inch. The tread should also be worn evenly. |
|
|
Rear tire: sidewall |
Sidewall of the tire should not be cut or damaged. |
|
|
Rear tire: Air stem valve and cap (both tires) |
Check for the air stem valve and cap on both tires. They should both not be missing, damaged, or broken. |
|
|
Rear tire: Inflation |
The tires should appear to be properly inflated. |
|
|
Rear tire: Spacing |
evenly spaced and not rubbing against each other. There should be no foreign objects between the two tires. |
|
|
Rear tire: Rim |
The rim cannot be bent or broken. The rim should be free from rust and have no welding repairs. |
|
|
Rear tire: Lug nuts |
Check all of the lug nuts to make sure they are present, not loose or cracked, and are free from rust. |
|
|
Rear tire: Axle seal |
Run your hand under axle seal. It should not be leaking any oil. |
|
|
Mileage (can collect it later as well) |
You must collect the mileage from the rear hub odometer. Make sure to record it on the check-in/check-out sheet. |
|
Running light |
This light is located at the rear of the bus near the top. The light should be clean, not missing or broken, and functioning properly (because the bus is in night run). This running light should be red in color. |
|
|
Reflector |
located at the rear of the bus near the bottom. The reflector should be clean, not missing or broken and red in color. |
|

Clip lights |
There should be 5 clip lights. They should be clean, not missing or broken, functioning properly (because the bus is in night run) and red in color. |
|
|
Rear destination sign |
Check that the destination sign is clean, not missing or broken, and is functioning properly. |
|
|
Rear reflectors (4 of them) |
Check all the reflectors as you talk about them. The reflectors should be clean, not missing or broken, and red in color |
|

Brake light |
It should be clean, not missing or broken, and functioning properly (because the parking brake is applied). |
|

Tail lights (4 of them) |
Check all four tail lights as you talk about them. They should be clean, not missing or broken, and functioning properly. |
|
|
Hazard lights |
Should be clean, not missing or broken, and functioning properly (because the hazards are on). |
|
|
Turn Signals |
Right Turn SignalCheck that the right turn signal is functioning properly (because the tester told you it was). Left Turn SignalCheck that the left turn signal is functioning properly (because the tester told you it was). After checking the turn signals, turn the hazards back on. Proceed back to the rear of the bus. |
|
Reverse lights |
should be clean, and not missing or broken. These lights should only come on when the bus is in reverse. |
|
|
License plate light |
It should be clean, not missing or broken, and functioning properly (because the bus is in night run). |
|
|
Leaks |
Check to see if there are any leaks under the bus |
|
|
Exterior Damage |
Upon completion of checking the entire exterior of the bus, ensure there is no damage to the bus, and state this to the evaluator. |
|
|
Proceed to drivers side of bus |
Regardless of what your evaluator answers, you still have to physically check everything on the driver side. After checking the driver side of the bus, proceed to the inside of the bus. |
|
|
Front Entryway |
Step lights (2 above doorway, 1 inside entrance)The step lights should be clean, not missing or broken, and functioning properly. Handrails (yellow handrails)The handrails should be securely attached to the bus. Passenger Mirror (2 of them)The passenger mirror should be securely mounted, not damaged, and clean. |
|
|
Seats (including the driver’s seat) |
Every seat in the bus should be firmly attached to the floor. The cushions should all be securely attached to the seat frame. All the seat frames should not be broken. |
|
|
Driver Seatbelt |
The seatbelt should be properly mounted, secured, and adjusted. The seatbelt should not be ripped or frayed. |
|
|
Stanchions |
All stanchions should be securely attached to the bus. The stanchions should not be broken. |
|
|
Passenger signal |
Check to ensure the passenger and wheelchair passenger stop request signals on both sides are operating properly. |
|
|
Emergency exits |
WindowsIdentify that every window with a red handle is an emergency exit.
Explain that in order to open the window emergency exits, you must pull down on the red handle and push out. Push open one emergency exit on each side. The emergency exits should operate smoothly and close securely. Roof hatches Point out that there are two roof hatches: one in the front and one in the back. Explain how to operate the roof hatches. |
|
|
Rear doorway |
Step lights (2 white lights above doorway, 1 green above doorway) The step lights should be clean, not missing or broken, and functioning properly. Handrails (yellow handrails) The handrails should be securely attached to the bus. Passenger Mirror (1) The passenger mirror should be securely mounted, not damaged, and clean. |
|
|
Wheelchair restraints |
Check to ensure that you have four wheelchair restraints on each side and test that all are working properly. They should operate smoothly, not be damaged, and lock securely. Check to make sure the seatbelts are functioning properly. |
|
|
Emergency equipment |
Emergency triangles Make sure there are three of them. All three triangles should have red reflectors. Fire extinguisher Make sure the arrow is in the green, indicating the extinguisher is properly charged. Make sure the fire extinguisher is properly secured. First aid kit Check to ensure there is an assortment of items. Accident package Check that accident package has incident and accident reports, accident procedures, accident investigation cards, and accident notification slips. |
|
|
Gauges |
Make sure that the air pressure gauge and voltmeter are properly functioning. |
|
|
Dash lights and turn signals |
Make sure the hazards light up on the dash. Turn off the hazards, then check to make sure the turn signals light up on the dash. The high beam indicator should also light up on the dash when the high beams are turned on. |
|
|
Steering |
Wheel should give no more than 2 inches before tire begins to turn |
|
|
Horn |
The horn should function properly. |
|
|
Heater/AC & Defrosters |
Test the heater/AC and make sure they turn on. Turn on the defrosters and make sure they are blowing warm air. |
|
|
Interior lights |
The interior lights should be properly functioning. |
|
|
Radio & PA system |
Perform a Unitrans radio check. Check that the PA system is functioning properly. |
|
|
AVL |
Log into the AVL system as any column and make sure it properly functioning. |
|
|
Windshield Wiper |
Turn the windshield wiper knob to make sure the wipers turn on. Press the windshield wiper knob to test the washers. |
|
|
Door Controls |
Check that the door controls are functioning properly. The settings should operate separately from each other. |
|
|
Wheelchair lift/Kneeler |
Kneel the bus. Deploy and stow the ramp 3 times. Check for damage to the lift. |
|
|
Exterior Mirrors |
Make sure that your mirrors are properly adjusted. You should be able to see clearly out of both your left and right side mirrors. |
|
|
Check-in/Check-out Sheet |
Make sure that you completely fill out the check-in/check-out sheet. This includes filling out the top section with the date, day, bus number, your name, and the mileage. |
|
|
Governor Cut-In |
Prior to starting this brake check, make sure the needles on the air pressure gauge are not rising. Press and release the service brake and wait 20-30 seconds. Check to see if the governor cuts in. You will know the governor cuts in because the needles on the air pressure gauge will continuously rise. The governor needs to cut in at or above 85 PSI. Indicate the PSI the governor cuts in. |
|
|
Low Air Pressure Buzzer/Light |
Repeatedly press and release the service brake until you hear the low air buzzer come on continuously. The low air pressure warning light on the dash must also come on. They both must turn on between 55 and 75 PSI. Indicate at what PSI the buzzer and light came on. |
|
|
Spring Brake Test |
Turn off the bus and release the parking brake.
Slowly pump down on the service brake. Continue to do this until the parking brake pops back out.
This should happen between 20 and 45 PSI. Indicate at what PSI the parking brake pops back out. (In New Flyers the parking brake pops back out around 60 PSI. Explain to the evaluator that while the bus technically fails the Spring Brake Test, it is still safe to operate) |
|
|
Governor Cut Out |
Turn the bus and the high idle on. Let the bus air itself back up. The governor needs to cut out by 130 PSI. You will know that it cuts out because the arrows on the gauge will stop rising. Indicate at what PSI the governor cuts out. |
|
|
Applied Brake Check |
Turn off the high idle and the bus, and release the parking brake. Apply the service brake. After the initial drop in air pressure, let the bus sit for a minute while applying the service brake. The bus cannot lose any more than 3 PSI. Indicate how many PSI the bus has lost at the end of the minute. |
|
|
Static Brake Check |
Remove your foot from the service brake.
With the bus and parking brake off, let the bus sit idle for one minute.
During this minute, the bus cannot lose more than 2 PSI.
Indicate how many PSI the bus has lost at the end of the minute. ENGAGE THE PARKING BRAKE THEN START THE BUS (Automatic failure if you do not) |
|
|
Service Brake Check |
Apply the service brake and release the parking brake. Put the bus in drive and move forward at no more than 5 MPH. Apply the service brake. The bus should come to a complete stop and rock forward and backward, but not side to side. |
|
|
Parking Brake |
Leave the bus in drive. Remove your foot from the service brake and let the bus move forward at no more than 5 MPH. Apply the parking brake. The bus should come to a complete stop and rock forward and backward, but not side to side. |